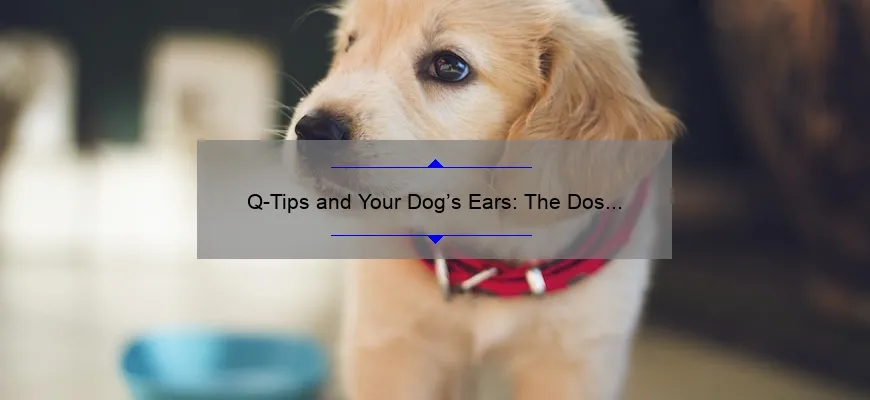
Step-by-Step Guide: How Can I Clean My Dog’s Ears with Q-Tips Safely?
If you’re a responsible dog owner, cleaning your dog’s ears on a regular basis is essential for their overall health and well-being. However, the thought of sticking something inside your furry friend’s delicate ears can be daunting – especially if you’ve never done it before! Fear not, though; in this step-by-step guide, we’ll walk you through how to clean your dog’s ears with Q-tips safely.
Step 1: Gather Your Supplies
Before diving in headfirst (or should we say ear-first!), make sure you have all the necessary supplies at hand. You’ll need:
– Cotton balls or Q-tips
– Ear cleaning solution (you may want to talk to your vet about which one is best for your particular pup)
– Treats (optional but highly recommended)
Make sure everything is within reach so that once you start cleaning those puppy ears, there are no interruptions.
Step 2: Get Your Dog Ready
Now that you’ve got all your supplies ready, it’s time to get your pooch ready too. Have them lie down and relax while you give them some affectionate rubdowns; this could soothe any stress or anxiety they may experience during ear-cleaning.
It also helps to have another person hold onto the leash since a moving target can be quite challenging. Reinforce good behavior throughout by rewarding him/her with kind words or treats after each step.
Step 3: Apply Ear Cleaning Solution
Once Fido is lying comfortably on his side – rather like he would if he was getting scritched behind the ear – put several drops of ear-cleaning solution into his ear canal. Gently massage the base of their ear for around thirty seconds so that gravity draws out dirt from deep inside.
One thing worth mentioning here is not overdoing it while pouring fluid into his/her ears as this might cause infections when water gets trapped because they shake excessively afterward . However, this is where treating your doggo with affection and treats comes in handy as it helps distract them throughout the process.
Step 4: Wipe Away Excess Dirt
Let their head shake a bit to help loosen dirt and debris. It would be best if you then grabbed a cotton ball – given that they have excessive fur around the ears – or Q-tip to wipe away any excess solution seized in his little ear folds gently.
You can use one end of a Q-tip wrapped tightly with gauze for added safety when cleaning the ears’ interior canal. However, avoid inserting anything too deep inside-the-ear-canal as you might push uncleaned wax deeper within the canal creating more problems than good.
Step 5: Repeat on Other Ear (If Necessary)
Once again, reward your furry friend here before commencing on repeated steps for his second ear if also dirty. Keep an eye and observe how he/she behaves during payment sessions so that there are no ongoing changes while examining future cleanings’ progress!
Final Thoughts
Cleaning your dog’s ears doesn’t need to be intimidating – just follow these simple steps, stay calm yourself whilst soothing them at every turn! Be sure always to check guidelines based on individual needs or specific instructions from vets before embarking on DIYs; otherwise, all pups should now get ready for cleaner, happier smelling earmuffs thanks to you!
FAQs About Cleaning Your Dog’s Ears with Q-Tips
It’s a well-known fact that our furry pets require regular grooming and attention to maintain their health and happiness. One vital aspect of this is cleaning the ears, which can harbor dirt, wax buildup, and even harmful bacteria that could cause discomfort or infections if left untreated. While there are different methods for ear cleaning depending on your pet’s breed and individual needs, using Q-tips is one of the most common techniques used by dog owners.
However, despite its popularity, there are some commonly asked questions about using Q-tips to clean dog ears that deserve reliable answers based on expert advice and research. So let’s dive into these FAQs (Frequently Asked Questions) below:
1. Is it safe to use Q-tips to clean my dog’s ears?
Yes and no – while Q-tips can be a handy tool for removing visible debris from the outer part of your dog’s ear flap/skin folds in preparation for deeper cleaning), they’re not recommended for reaching inside the ear canal itself where inflammation or bacterial infection may lie hidden because you risk pushing debris further inside instead of getting rid of it completely.
So as long as you limit yourself solely taking care when handling within sight range then yes~ they’re safe- but otherwise it’s best sot seek professional help
2. How often should I clean my dog’s ears with Q-tips?
The frequency should depend upon how much wax accumulation or general dirtiness your pup experiences over time mixed with how exposed they are since removed wild thrives naturally groom themselves so making sure to check them out routinely will make all the difference whether once a week/monthquarter- stick whichever feels acceptable!
3.How do I know when it is necessary to clean my Dog Ears?
Here are some signs indicating an immediate necessity:
• foul odor
• redness/itching/biting at affected area
• excess discharge/dirt/wax build-up
• shaking head reflexively
• rubbing ears over carpet or furniture
Whenever any of these signs appear, they’re indicating an urgent need from your dog’s end to have their ears cleaned off and attended to ASAP.
4. What other ear cleaning methods work effectively for dogs?
Ear wipes are increasingly becoming popular as safer alternatives in pet stores since they’re pre-packaged with a specific solution accompanied and designed solely for canine use in general.
And if you fancy homemade solutions then mixing hydrogen peroxide, apple cider vinegar (diluted), and water is considered a suitable alternative.
Regardless always consult vet professionals first before trying anything new upon the advice given it could save both time & money while enhancing good pup welfare!
5 Important Facts to Consider Before Cleaning Your Dog’s Ears with Q-Tips
Our furry friends are a vital part of our lives and we do everything in our power to ensure they stay healthy, happy, and comfortable. One way to maintain your dog’s hygiene is by cleaning their ears regularly. Ear infections can be quite painful for dogs, making it essential to keep their ear canal clean and free from debris.
However, before you start digging into your dog’s ear with Q-tips or any other method at home, there are several things that you need to consider:
1. Understanding Your Dog’s Ears
Before attempting anything in an animal’s body parts out of curiosity or error of judgment; one must seek knowledge about the anatomy first. Canine ears vary depending on factors such as breed sizeand shape: floppy vs standup ones but all have a similar structure includingthe eardrum, auditory canal lining,auditory tube (similar like humans), residual bones etc,. Misusing cotton swabs can easily harm the sensitive structures inside them causing damage which may result in severe pain or even permanent damage.
2. What Kind of Ear Cleaner Should You Use?
There are many over-the-counter cleaners available at pet supply stores designed specifically for dog ears.The best ones usually combine antibacterial ingredients with a drying agent to help dry up moisture accumulating inside while disinfecting any potential microbes.However selecting the proper type needs advice from experts because each has its own strengths & weaknesses therefore if couldn’t get expert consultation stick with solutions having hydrogen peroxide ,alcohol,diluted vinegar like acetic acidas active ingredientall whilst skipping any oil-based cleansers made for human bodies sincecanines react far differently than us due differencesince both possess entirely different biochemistries.
3. Do not touch beyond visibility
While cleaning using soaked cotton balls,you cannot see below the surface-NEVER dig too deeply.A simple rule-of-thumbwhen doing it yourself techniqueis “clean what you can see”.Clean up to the point where nothing but gentle pressure is being applied because carrying on with it usually creates more issues and traumatizes your furry friend. If you find yourself facing an obstruction in some parts of the canal or foul smell even though small following cleaned portions, don’t hesitate straight away visiting a veterinarian has he will have special tools that enable visualization using lights & cameras.
4. Avoid any underlying medical issue
Indeed cleaning helps keep ears healthy but if there’s already an infection, injury or other ailments in progress then handling things carelessly can make them worse.For example floppy eared breeds are prone to ear infections as their auditory canal doesn’t get much air circulation since trapped moisture inside provides perfect breeding ground for bacteria/fungi.Irritation from allergies manifests through swollen redness leading blood vessels swelling up the pinna (the external part of their ear) resulting intense discharge.So,don’t ever force anything solid causing problems beyond your scope rest call /or checkup by doctor.
5. Seek professional recommended advice before choosing a self-treatment
Guidance from veterinarians donning advanced degrees involving animals’ welfareare highly advised via available consultancywith pet-centered blogs /discussion groups forumsby animal-loving proexpertsbefore picking any preferredmethod.Normallythey will be familiar with potential causes,symptoms,treatments optionsprevalent among specific breed types.Hence before trying anything new or untested always take ADVICE first.Rest,every corrective personal grooming equipment requires care just like not go overboard yanking out excessive hair/ear-bush here too.Easing off slowly goes furthest!