Short answer how to draw a dog eye:
To draw a realistic dog eye, start by sketching the basic shape of the eye and iris. Add details like eyelashes, highlight, and shading to create depth and dimension. Use reference images for accuracy.
Top 5 Facts You Need to Know Before Drawing a Dog’s Eye
Dogs are some of the most lovable and loyal pets that we could ever ask for. They offer us so much joy and comfort, and it’s no surprise that many artists choose to draw them. But as anyone who has tried to draw a dog before knows, getting their eyes right can be quite challenging! In this blog post, we’ll go over the top 5 facts you need to know before drawing a dog’s eye.
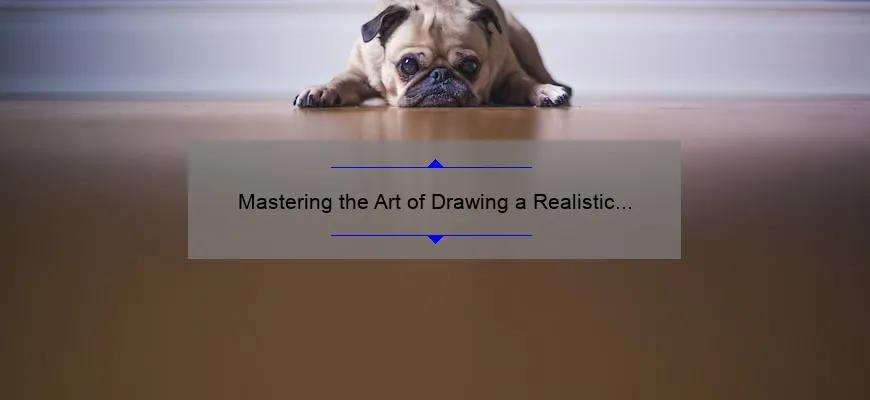
1) Dogs’ eyes have different shapes
Different breeds of dogs have different eye shapes. For example, pugs have big round eyes while greyhounds have almond-shaped ones. Before starting your sketch, take a moment to observe the breed or mix of breeds you’re going to depict. This will help you get an accurate representation of what their eyes should look like.
2) Pay attention to eyelids
Eyelids play an important role in making dogs’ eyes appear more realistic in art. Their eyelashes also come into play when representing emotion through animals’ body language – think excitement vs fearfulness at first glance.
3) Use reference photos
The internet is full of great reference photos for drawing dogs’ eyes from any angle or position imaginable! Using these resources can provide an excellent visual guide for understanding proportions and giving structure – even if not completely lifelike appearance – which would be very beneficial in learning how to compose better-looking artwork by getting comfortable with accentuating elements such as highlights/shadows that make drawings stand out online aside from skills training camps/events where there might be professionals providing feedback/ critiques too!
4) Catching reflections
When creating a vivid impressionist painting style via fast brushstrokes or other impulses-driven techniques used during creation (whether based on your imagination stimulated by memory glimpses), always remember that one needs insight into catching light sources through keen observation skills regarding surroundings at any given time posing challenges without disrupting nature itself – AKA photorealism; mastering this skill can transform your artwork to astonishing results.
5) Emphasize shade and color
When drawing dogs’ eyes, it’s essential to pay close attention to the shading technique. The more detailed you are in creating contrast by emphasizing darker areas of their iris and pupil while giving lighter details such as highlights a lot more coverage – creating an illusion of depth. Don’t forget about using other colors besides black or brown when creating lovely dog eye paintings/designs too, as artists like Guggenheim award-winning artist Jenny Saville have proven professional painters/art educators via studies at universities worldwide that creativity without limits could open doors many thought impossible!
In conclusion, knowing these top 5 facts before drawing a dog’s eye should help make the process less daunting for any artist interested in portraying them accurately both aesthetically and structurally through any medium!
FAQs About Drawing a Dog’s Eye: Expert Tips and Tricks!
The eyes are often considered the windows to the soul, and this is no different when it comes to drawing dogs. The art of capturing a dog’s eye on paper requires not only skill but an understanding of their unique characteristics. In this article, we’ll address some frequently asked questions about how to draw a dog‘s eye.
1. What makes a dog’s eyes unique?
Dogs’ eyes are distinguishable from other animals due to their position, shape, and colors. You will typically find that dogs have round pupils as opposed to vertical ones present in cats or slitted ones like those in reptiles such as snakes.
Moreover, most breeds have two differently shaped muscles located above and below the pupils that allow them greater control over light entering their vision range than humans possess. These peculiarities together influence how you should approach sketching your furry friend’s gaze onto paper.
2.How do I get started drawing my dog’s eyes?
Beginning with simple sketches helps bring clarity into perspective regarding what you want your final pieces outcome before moving forwards for detailing purposes ultimately?. Hence start by outlining basic shapes related to the structure of any breed’s eye explicitly without adding too many details so quickly…gradually work towards more challenging aspects such as iris size or even eyelash activity.When attempting realism around intricate areas like these take care that lines aren’t jumpy; else they may come off looking choppy instead of natural-looking rendering option at hand here could be layering which allows gradual intensity build-up through each stroke added signifying depth overall crafted .
3.What color pencil should I use for coloring my pet pooch’s irises?
Color choice depends heavily on animal species sometimes specifically breed therefore reference points key.knowingly recognize essential differences between say huskies versus Chihuahuas drastically differ interms tone hence select shades accordingly targeting achieving accurate representation throughout .
For instance,you might need lighter hues if working upon breeds with lighter-hued coats. Above all while coloring, remember that you can always rely on multiple shading options to ensure perfect depiction of your dog‘s eye- structure once and for all.
4.What techniques can I use to draw a realistic reflection in my pet’s eyes?
Adding reflections into canine pupils proves effective creating life-like effect turning around final product associated with body language suggestive significance.Visualizing the things which excite or calm them may help identify where precisely light sources falling thus reflecting upon pupils and proceeding accordingly here works best.Blending paints shadows proportionately onto fur expectedly helps create convincing lighting effects underneath such instances too ..nevertheless experimenting helps uncover unique color palette perhaps making it personal venture ultimately.
In conclusion, drawing a dog’s eye may sound easy, but requires patience and skillset without compromising quality.Begging for more stimulus before getting started could give insight regarding attitudes towards behaviors exhibited by furry companions.finally keep practicing! As they say, practice makes it perfect; no one better than artists themselves knows how right? Start today !
Master the Art of Drawing a Dog Eye with These Easy Techniques!
Drawing a realistic dog eye can be challenging, but with the right techniques and practice, you can master this art. The eyes are the most expressive part of a dog‘s face, and capturing their emotion in your drawing is crucial to create lifelike artwork. Whether you’re a beginner or an experienced artist, these easy tips will help you add depth and realism to your canine drawings.
1. Observe Dog Eyes
The first step towards drawing realistic dog eyes is observing them carefully. Dogs come in various breeds with different eye shapes and colors. Study your subject breed’s particular characteristics by looking at photographs or studying dogs in person.
Take note of factors such as:
– Size: Dog eyes vary significantly; some have small almond-shaped eyes while others may have larger rounder ones.
– Shape: Pay close attention to the shape of the iris – whether it’s circular or oblong.
– Eyelids & Lashes: Look out for unique details like eyelids (prominent vs subtle) and lashes length – they bring out great authenticity to drawings!
2. Sketching Your Outline
After carefully observing dog eyes, start sketching basic outlines using light lines that are easily erasable if needed. Draw lightly around general features such as pupils, highlights/shadows on irises/eyes whites/pupils/darks etc., which will serve as guides when adding detail later on.
You could use circles too delineate where different aspects belong within each eye – ie white area/sheen over pupil/bottom dark areas below pupil/iris ring surrounding coloured area…..using “map” lines should make things easier during detailed work coming up.
3. Creating Depth With Shadows & Highlights
Creating shadows correctly helps give dimensionality — applying correct shading sets apart amateurish scribbles from polished sketches! Adding shadow underneath lower teeth would distinguish distances well between inner /upper elements above nostril folds thus making side view look compelling ….blended shading is best achieved through repeated and smooth layers of pencil application. Be patient, fine-shading takes time to produce!
4. Detailing The Iris
Color the iris depending on your subject’s eye color using mid-tones (lighter towards center darkening outwards) within it – adding highlights simulating light reflections.
Adding spots or flecks in the eyes allow it look less bland and monotonous …you could use colours darker than hair colour around edges/darker rim; enabling greater contrast.
5. Drawing Eyelashes And Fine Details
Finally, include subtle lash detailing that brings depth and context – thick brows above eye or long curved lashes? Both enhance different aspects watch for symmetry balanced between deepness / thickness when sketching these as they’ll frame final image rather well – Remember simpler detailing often suffices here: small touches can be more evocative than loaded composition!.
6. Finishing Touch Ups And Polishing
After finishing basic outlines with intricate details added, sit back careful scrutiny without any haste…smooth lines blended correctly across entire drawing shows mastery over its portrayal while sharpened photos prove helpful eraser smudging produces cleaner works too! Do take photographs periodically before moving onto iteration versions so you can tinker at will without anxiety halting efforts prematurely
In conclusion, mastering dog eyes might seem intimidating initially however comprehending shapes, shadows & light principles plus focusing on specific details required ensures great results; overall practice proves beneficial when transferring skills acquired toward other subjects including human portraits etc., Ensure a good amount of patience throughout every scribble — think critically yet approach casually even if perfectionism crops up midway.
Let imagination unfold along each pencil stroke until one finds wanted flow & finesse desired via techniques depicting canine essence lifelike stoicism forever bound to paper….